From grains to beer
[caption id="attachment_6302" align="alignleft" width="300"]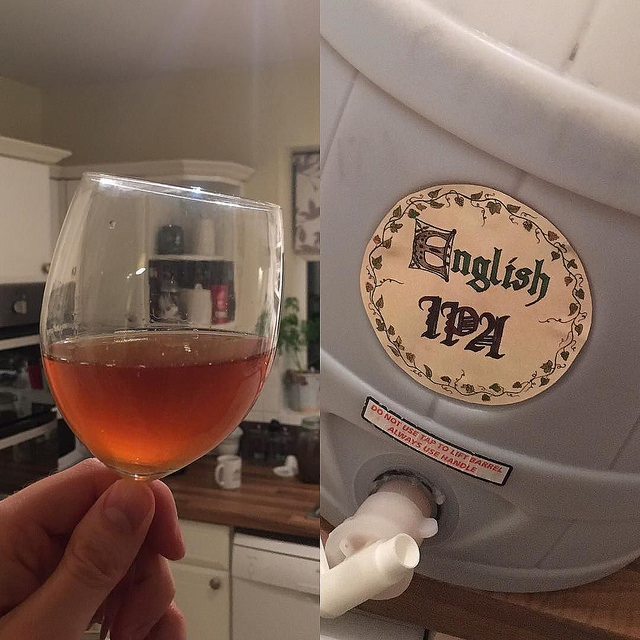 A recent grain brew. The glass contains the young beer out of the fermenter.[/caption]
There is a view by some that brewing beer is difficult. Frankly it is rather straightforward and after a bit of practice it is easy to get good results. Like with cooking, it really depends how far back down the recipe chain you want to go. For example, to make an apple pie you can do it from apples and ready-made pastry, or you can make the pastry yourself. To make beer purely, one would start with soaking grains to make a wort and then boil the wort before cooling and fermenting. However to get into brewing it is usually best to start with a kit.
A kit beer starter kit usually contains a large fermenting bin, airlock, various tubes and a set of malt extract, sugar and yeast. One combines the extract with boiling water, tap water and brewing sugar in the fermenter and then leaves it to ferment for a week or so. Sometimes the malt extract is pre-hopped and sometimes one needs to add hops later on. The hardest part of making a kit beer is sterilising everything properly.
At the end of 2015, I was itching to try proper grain brewing and I invested in a kit to make beer from grains. The kit included a boiler, a hot water tank, a sparging arm, a mash tun (a converted ice box with a false bottom and a tap) and various tubes. When dealing with large amounts of wort and water, it is best to have a boiler. In the boil phase of brewing, you need a consistent rolling boil which is difficult to achieve on a domestic hob. I already had fermenting bins from kit beer starter kits. The first brew I made was Dark Star Festival Ale.
[caption id="attachment_6305" align="alignleft" width="300"]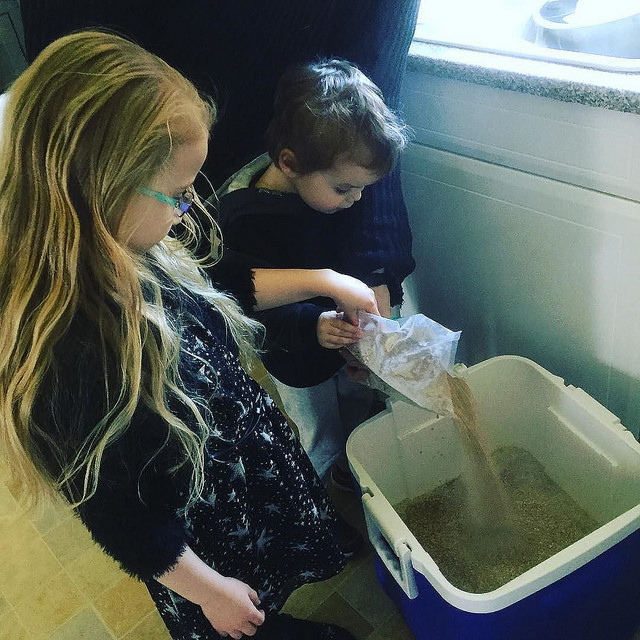 Start 'em young[/caption]
There is nothing really difficult about brewing from grains. The process is as follows:
- Set the boiler to heat the water to mash the grain. You may need to treat the water - e.g. soften it for a lager or harden it for a stout.
- Fill the mash tun with the required water and let it settle at the right temperature (usually 10-15 litres around 68 degrees Celcius but recipes differ)
- Add the crushed grains as per your recipe. I usually buy my grains crushed, but it is a similar situation to coffee - you should grind/crush at the last minute
[caption id="attachment_6303" align="alignright" width="300"]
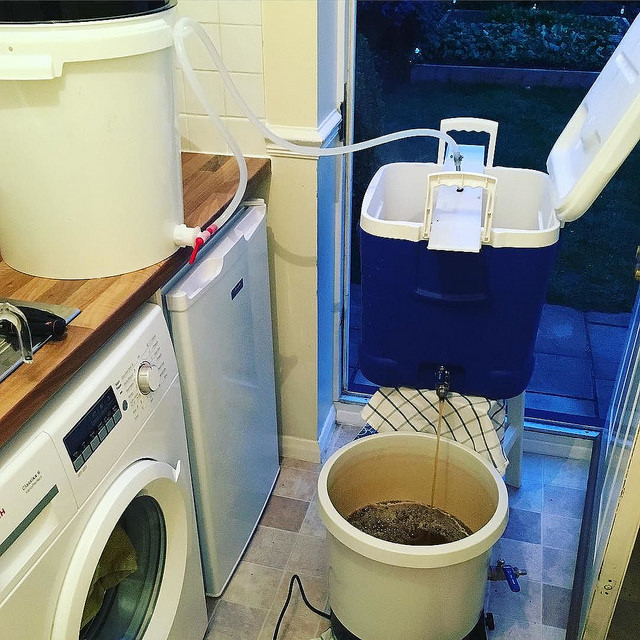 The Hot Water tank (top), Mash tun (middle) and boiler receiving the wort.[/caption]
 - Let the grains steep in the mash tun usually for an hour or so. It doesn't matter if you leave it a bit longer. It's usually at this point of the ceremony that I refill the boiler with fresh water for later and crank it up. And fetch the results of one of my previous brews...
- Take a run off from the mash tun to get any rubbish out from underneath the false bottom. Pour the run off back in the mash tun. Repeat until the liquid runs clear. I have seen methods that suggest circulating the entire liquid contents of the mash tun - I don't know whether this is necessary.
- Fill the hot liquor tank from the boiler and get the water to around 72 degrees C. An avid brewer would either have two boilers or a liquor tank with a heater. At this point, you have a three tier setup as pictured - hot liquor tank attached to a sparging arm on top of the mash tun with the boiler receiving the wort below. Sparging is the process of rinsing the grains. It can be done with a water can and hot water, but here we are using a sparging arm. [wpvideo nNluuUTD]
- Once you have the required amount of liquid (called wort) for your recipe (for example 27 litres), the boiler is set to boil. It usually takes half an hour for the boil to start and at this point the foam and scum on the top disappears starting in the centre of the boil. This is called the hot break.
- This is when I start timing the boil. From this point on, depending on the recipe, you will be putting hops into the boil at various stages.
- Time to grab another beer and relax a bit. Then sterilise the fermenter and airlock ready for the brew later. The boil usually takes just over one hour.
- Towards the end of the boil, I put in the chiller to sterilise it and add protofloc to help clear the beer later.
- At turn off, it is very important to chill the wort as quickly as possible to avoid contamination. The chiller I use is a coil of tube that sits in the boiler. One attaches a garden hose to the input and another hose to the output. To chill, run water through the hoses. The output is very hot to begin with and it will burn plants and lawns. It is best to run it into the drain directly or, better, into a water butt.
- Once it is cooler, transfer the wort to a fermenter. It needs to be aerated so you can just turn on the boiler tap and drop it from a height.
- Add the yeast. This used to be complicated but these days it isn't. Wyeast and Whitelabs have made it easy by developing pouches of yeast that can just be poured into the fermenter. Sometimes these pouches need to be brought up to temperature a few hours in advance of using.
- Close the lid and add the airlock. Leave in a warm place. It sometimes helps to use grease like vaseline to seal the airlock. Do not let the airlock dry out - top it up with boiled water regularly. After about 24 hours the beer will be fermenting and there will be a ring of scum in the fermenter at the top of the beer. The airlock should be bubbling.
- After a week or so, the beer should have completed its fermentation. There are several ways to check this and I won't go into them here. Sterilise your lines, barrels or bottles.
- Prime the beer by adding a sugar solution to the fermented or directly to the barrel. Then syphon the beer into the barrel (or bottles). It is important to syphon the beer and not pour it because you want to avoid oxygen at this stage.
-
[caption id="attachment_6306" align="alignleft" width="300"]
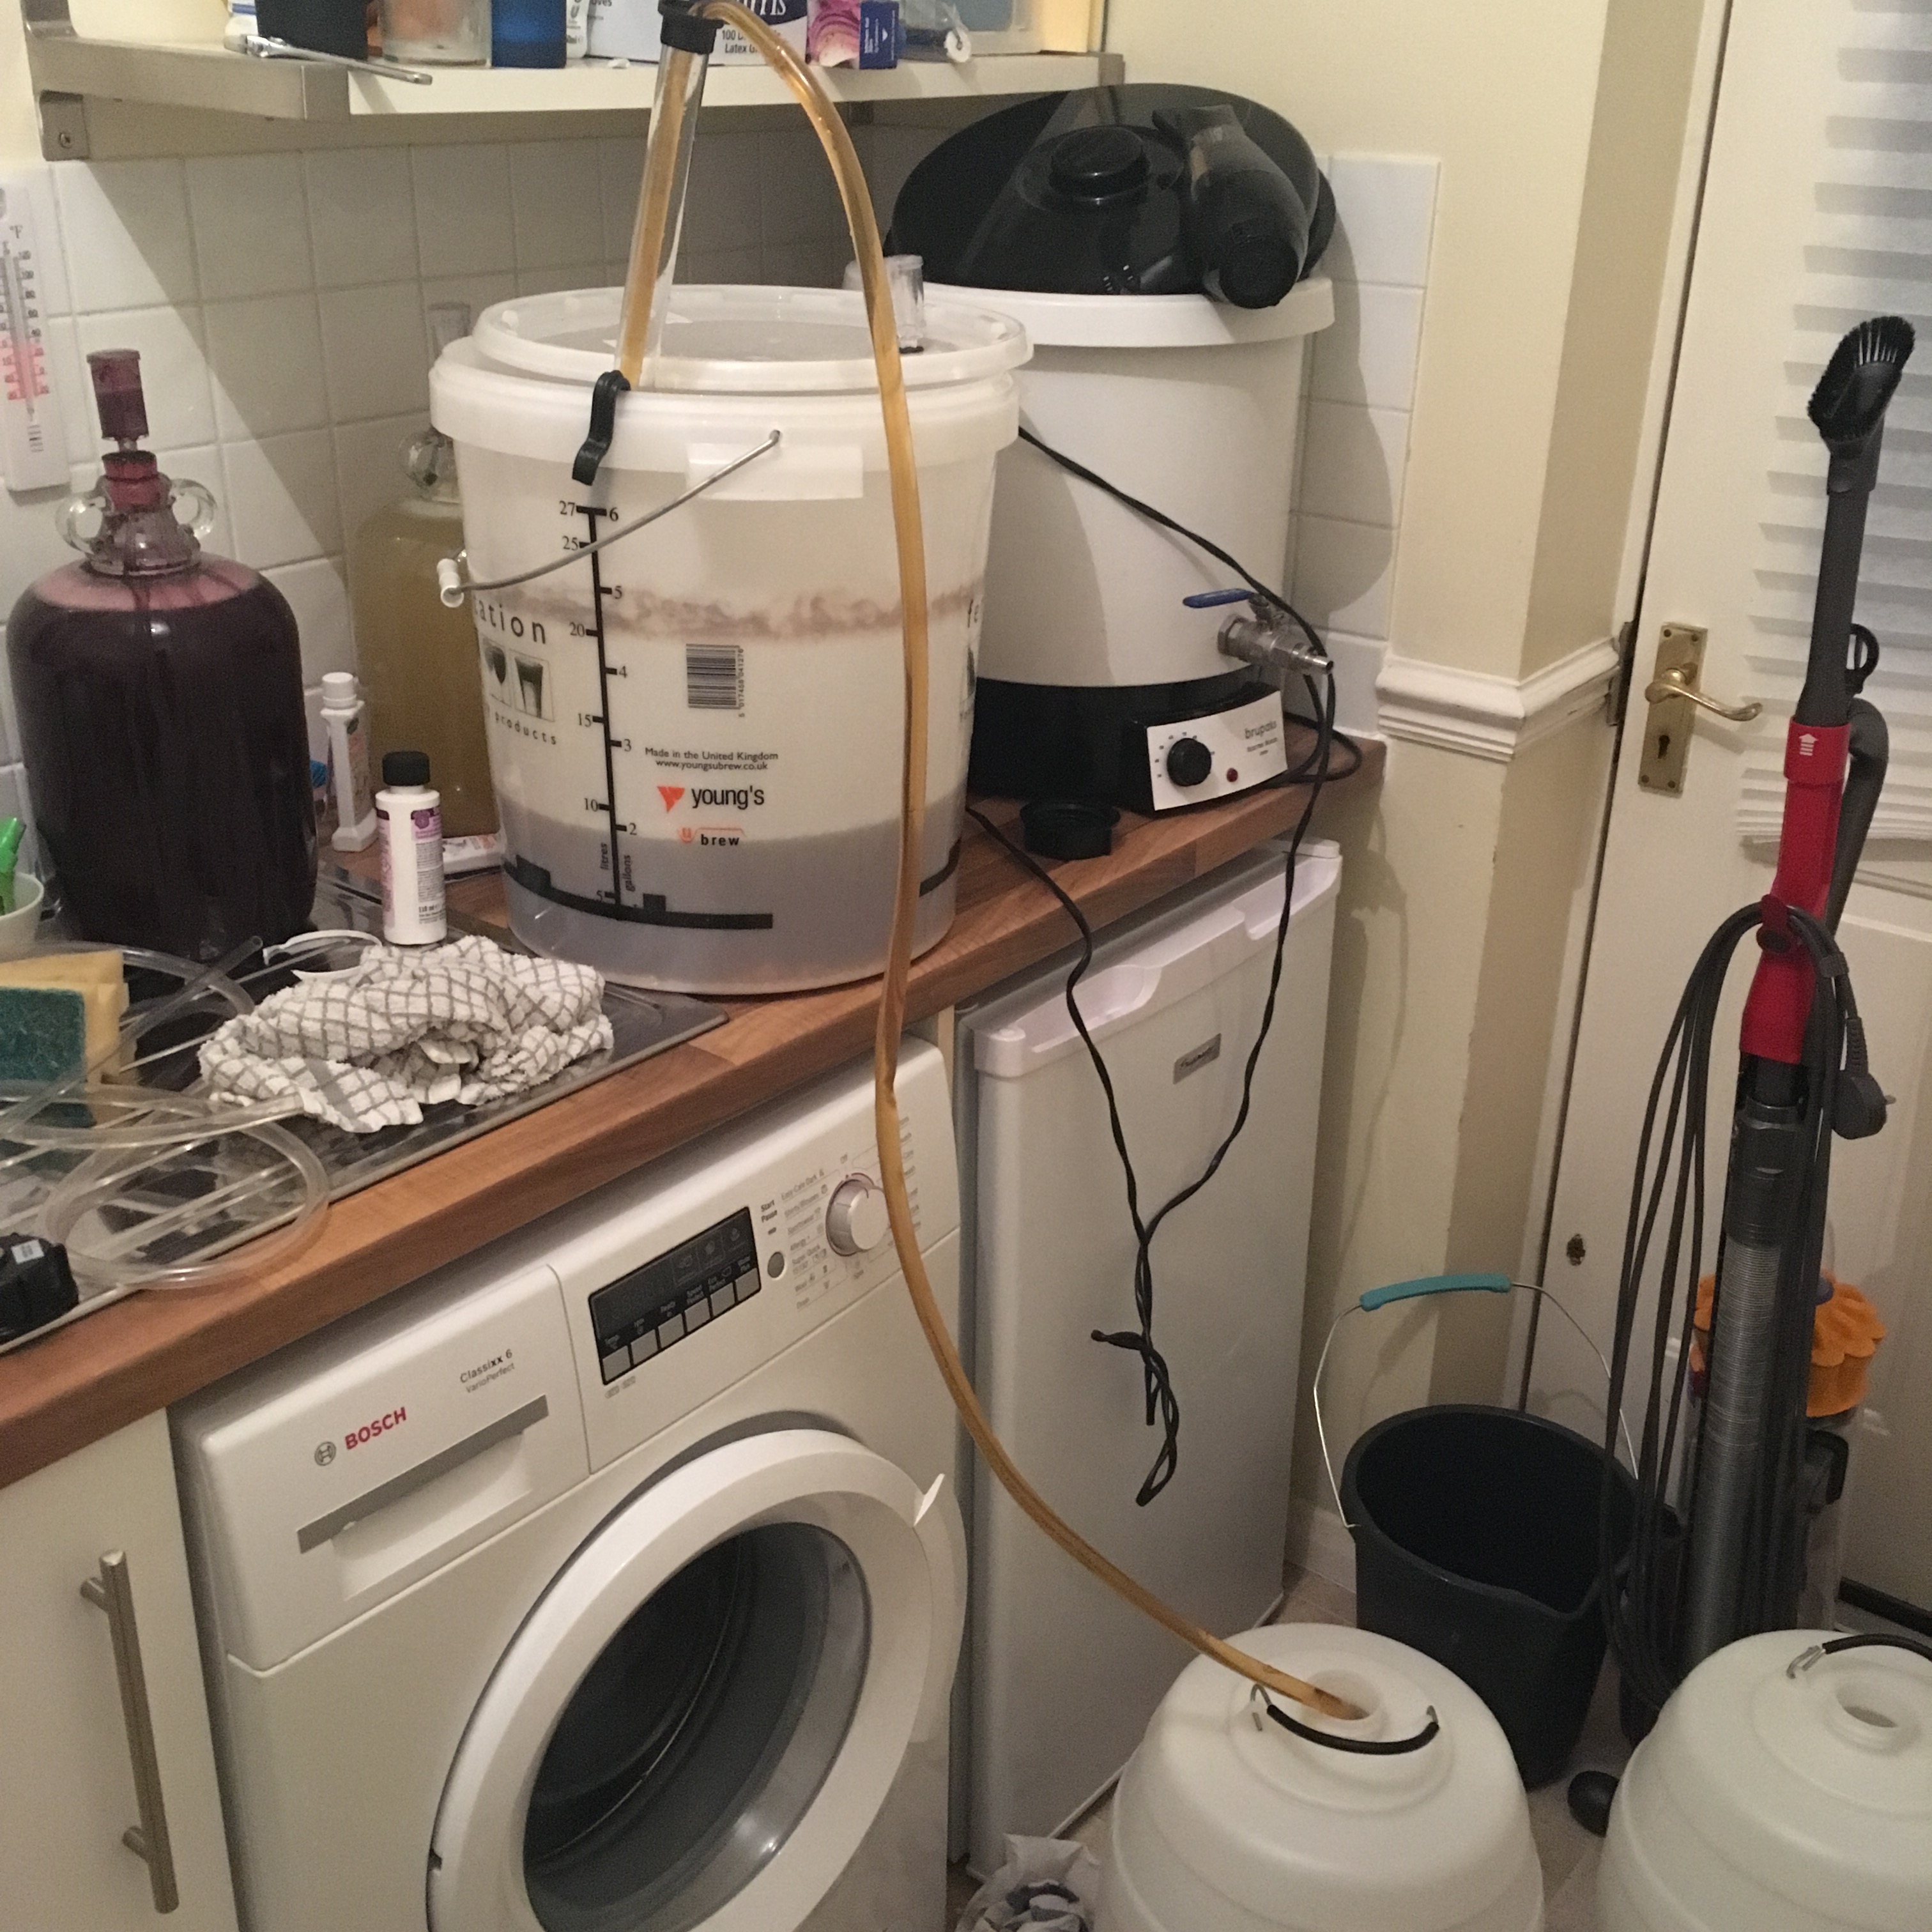 Syphoning into a barrel[/caption]
Seal up the barrel greasing any rubber seals. The beer should remain in a warm place so that the yeast eats the sugar and makes carbon dioxide. No-one really likes a flat beer.
- After 1-2 weeks, move the beer to a cool dark place to condition. In 3-4 weeks the beer is ready but some recipes will take longer.
There are many other variations of the method - for example, some brewers leave the wort undercovered for 1-2 days to get wild yeast into the beer. This is historically how people made beer until yeast was identified in the 18th century. Other brewers do not use sugar to prime the beer and prefer to let the beer naturally gas itself, or use a malt extract at the priming stage. In Germany it is against the law to use sugar in beer.
The method above is quite wasteful. The chilling requires running a cold water tap for 20 minutes. I really need to get myself a water butt. In theory it should be possible to use the water out of a butt to cool a wort because it does not directly go into the boil. At the end of the mashing and sparging phase, one has a box full of spent grain. I've never done anything clever with this, but it can be used as chicken feed or be used to make bread.
Resources
- Home Brew Beer by Greg Hughes - a good starting point to home brewing.
- Home Brewed Beers and Stouts by C. J. J. Berry & R. Elkins
- Brew UK Limited, online brew shop which stocks pretty much everything you need.
- Jim's Beer Kit, online forum.