Quick Start Guide for the Impatient Tezos Bakers

This is an edited section from my forthcoming book “Running Tezos Infrastructure”. No, I don’t know when I will have it finished. But I hope to have it done this year. Note also - the screenshots need updating to match the other detail in the article, so are provided for indication only.
Many people ask me “can I become a baker on Tezos, Chris?” The answer is “Yes, of course.”
In this article, we are going to set up baker on a test network (tallinnnet) using a Linux system. We will set up the node and the DAL. Then we will generate a baking key and a companion key. We will get funds for the baking key from the test network’s faucet. Then we will start the baker.
This is to give you a high-level introduction to the concepts and software components. You can skip this chapter if you want.
Also note that the keys are stored on the computer’s hard disc. If your system is compromised, you may lose your keys and your funds. On mainnet you will need to protect your keys with more security. We will be following up with another article on this for impatient people.
Prepare your machine
For this demonstration you will need a machine with a modern CPU with at least 4 cores and 16GB of RAM. For storage you will need 200GB of fast hard disc. SSD or NvME drives are best for blockchain storage. We will assume Debian Linux 13 throughout. Your user must have sudo access.
If you don’t have a machine, you can use a cloud service like Amazon Web Services EC2 or Google Cloud Compute Engine. On both, the standard disc volumes are fast enough for blockchain storage.
Download and install Octez
We will install the Octez client, node, DAL node and baker packages. We do this from the official Octez package site. Before we do that, it’s prudent to check that the machine is up to date:
$ sudo apt update
$ sudo apt upgrade -y
Then make sure that curl, wget and gpg are installed:
$ sudo apt install -y curl wget gpg
Then accept the GPG key from the Octez packages repository:
$ curl -s "https://packages.nomadic-labs.com/debian/octez.asc" | \
    sudo gpg --dearmor -o /etc/apt/keyrings/octez.gpg
Add the package source list for Octez. For example:
echo "deb [signed-by=/etc/apt/keyrings/octez.gpg] https://packages.nomadic-labs.com/debian trixie main" \
 | sudo tee /etc/apt/sources.list.d/octez.list
Update the packages catalogue.
$ sudo apt update
Install the baker, which installs the client, node and DAL node as dependencies:
$ sudo apt install -y octez-baker
Configure the node
We are going to run the node on the tallinnnet test network. This test network is smaller than mainnet and is specifically for testing. More importantly, the coins do not have any real value and so you can safely make mistakes.
The software in the Octez packages run under a user account called tezos. We need to use this account to configure the node. Firstly, switch to this user:
$ sudo su - tezos
Now we configure the node.
$ octez-node config init --network=https://teztnets.com/tallinnnet \
                        --history-mode=rolling \
                        --net-addr="[::]:9732" \
                        --rpc-addr="127.0.0.1:8732"
Created /home/tezos/.tezos-node/config.json for network.
The command line options are:
- network - tells the node we want to run on the tallinnnet test network. The URL points to a web resource containing information about it.
- history-mode - specifies the rolling history mode.
- net-addr - tells the node to listen on TCP port 9732 to the Tezos gossip network.
- rpc-addr - tells the node which address and port to listen on for Remote Procedure Calls (RPC). We will only listen locally on the machine.
In rolling history mode the node keeps enough information to take part in the chain.
The node’s storage and configuration are in the directory .tezos-node in the tezos user’s home directory. Included in the config.json file is information about the network’s boot nodes. They have enough information to help your node join the network.
Download a snapshot
A snapshot is a recent backup of the Tezos blockchain. We will download a snapshot from https://snapshots.tzinit.org’s snapshot server located in Europe. Then we will import it.
As the tezos user:
$ wget https://snapshots.tzinit.org/tallinnnet/rolling
2024-06-12 15:02:33 (97.7 MB/s) - ‘rolling’ saved [1333975040/1333975040]

$ octez-node snapshot import rolling
Jun 12 15:02:51.584: Note: the import of a snapshot can be sped up using the '--no-check' option.
Jun 12 15:02:51.584:   Only use this option if you fully trust the snapshot source.
Jun 12 15:02:51.584: importing data from snapshot rolling:
Jun 12 15:02:51.584:   chain TEZOS_TALLINNNET_2025-11-18T21:00:00Z, block hash BKsaiQCKKyhRtF3zexct7dyzzvoKzXBoyk8jt7cvZ6hHSBUiKSk at level 6606685, timestamp 2026-03-12T11:59:56-00:00 in rolling (snapshot version 7)
Jun 12 15:02:51.584: you may consider using the --block <block_hash> argument to ensure that the
Jun 12 15:02:51.584:   block imported is the one you expected
Jun 12 15:02:51.585: retrieving and validating data. This can take a while, please bear with us
Copying protocols: 1/1 Done
Importing context Done
Checking context integrity Done
Storing floating blocks: 360 blocks written Done
Jun 12 15:06:15.369: successful import from file rolling
Exit the tezos account to your normal account.
$ exit
Run the node and synchronise it
The packages provide a convenient set of startup scripts. Enable and start the node service with:
$ sudo systemctl enable octez-node
$ sudo systemctl start octez-node
You can check progress in the logs:
$ sudo tail -f /var/log/tezos/node.log
Jun 12 15:10:15.300: the node configuration has been successfully validated.
Jun 12 15:10:15.300: read identity file
Jun 12 15:10:15.300: starting the Octez node 24.4 (43dd36f3)
Jun 12 15:10:38.854: disabled local peer discovery
Jun 12 15:10:38.857: p2p initialization: bootstrapping
Jun 12 15:10:39.001: p2p initialization: p2p_maintenance_started
Jun 12 15:10:39.436: block validator process started with pid 39499
Jun 12 15:10:39.928: external validation initialized
Jun 12 15:10:40.639: activate chain NetXnHfVqm9iesp
....
Jun 12 15:10:41.240: synchronisation status: synced
Jun 12 15:10:41.241: chain is bootstrapped
The node generates an identity key to join the network with. Then the node will synchronise with the network. It downloads the blocks from when the snapshot was taken to the current time.
Once the node’s identity has been generated, you can connect to the node and see the progress:
$ octez-client bootstrapped
Warning:

                 This is NOT the Tezos Mainnet.

           Do NOT use your fundraiser keys on this network.

Waiting for the node to be bootstrapped...
Current head: BMFiD4AvKcMd (timestamp: 2024-06-12T13:23:46.000-00:00, validation: 2024-06-12T14:09:56.782-00:00)
Current head: BM7qgqsKSPTD (timestamp: 2024-06-12T13:23:51.000-00:00, validation: 2024-06-12T14:09:56.816-00:00)
...
Current head: BM2JfqL2DJnD (timestamp: 2024-06-12T14:09:26.000-00:00, validation: 2024-06-12T14:10:11.796-00:00)
Current head: BLqtHTHcfoYW (timestamp: 2024-06-12T14:09:31.000-00:00, validation: 2024-06-12T14:10:11.825-00:00)
Node is bootstrapped.
Use CTRL+C to exit if necessary.
We have successfully put a Tezos node on the tallinnnet test network.
Every time we run the octez-client command we usually get the warning below. I won’t include it in the output anymore in this section. You can suppress it by setting an environment variable but we will cover this later.
Warning:

                 This is NOT the Tezos Mainnet.

           Do NOT use your fundraiser keys on this network.
Setup a wallet
On Tezos, you need a stake to bake. You must connect a wallet to the baker process. The produced blocks are signed with the baker’s secret key held in the wallet. The baker must be able to access the key to sign the blocks.
We will generate a key pair (a public key and a secret key) for the purposes of baking on tallinnnet. We will not protect the key pair as any related coins do not have value on the test network. We will see later that a large part of a baker’s job is protecting keys on mainnet.
As the baker processes will run in the tezos account, we need to create the wallet there too. The wallet is stored in the .tezos-client directory in the tezos user’s home directory. Below we create a key pair and list the known addresses including the one we have created. We also create a companion key used by the DAL node. We will use BLS keys.
$ sudo su - tezos
$ octez-client gen keys bakerkey --sig bls
$ octez-client gen keys companion --sig bls
$ octez-client list known addresses
bakerkey: tz4E9Sgyx2mRg6GmVZRGNo8dD2imaXx9zfAf (unencrypted sk known)
companion: tz4TJdBjeX5cnUFPUUXgiLbdEm1G7HgGceok (unencrypted sk known)
Fund the wallet from the faucet
We need some coins for our wallet. A baker needs to have access to a stake of at least 6000tz to get baking rights. Also we will need a small amount for fees. The first thing a baker does is “self-delegate”. This tells the blockchain the baker intends to bake with the wallet. It requires a small amount of tez as a fee. For the purposes of this demonstration, we will get 7000tz from the tallinnnet faucet.
Of course, if we were doing this on mainnet, we would have to get real coins by other means. For example, by buying them on an exchange.
With your web browser, go to: https://faucet.tallinnnet.teztnets.com. In the section Fund any address, enter the address from the previous step. Then enter 7000tz in the dialogue. Click “Request 7000tz”.
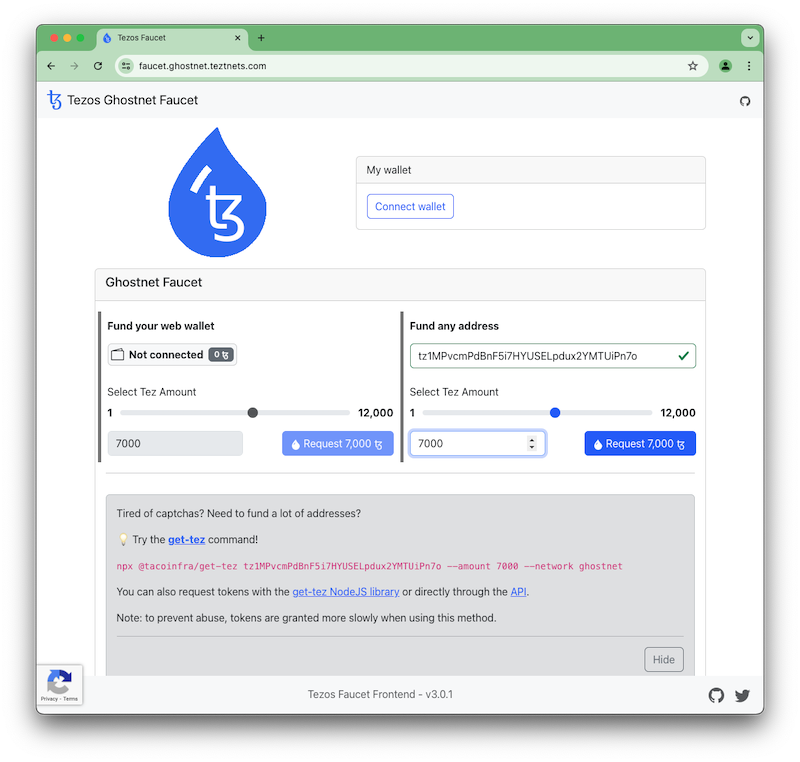
There is a “proof-of-work challenge” that your browser must solve before the coins are sent. This prevents abuse of the faucet by slowing the requests down.
Now you have your coins, you can check your balance on the command line:
$ octez-client get balance for bakerkey
7000 tz
Configure the DAL Node
At the time of writing, it is not mandatory to run a DAL node, but if you don’t you will miss out on rewards. The baker uses the DAL node for attestations. Configuring and running the DAL node is easy. As we are setting the node up specifically for our baker, it’s best practice to tell it the baker’s address.
$ sudo su - tezos
$ octez-dal-node config init --attester-profile tz4E9Sgyx2mRg6GmVZRGNo8dD2imaXx9zfAf
$ exit
Now start the DAL node. It will join the DAL network for tallinnnet. You can check that status of it in the file /var/log/tezos/octez-dal-node.log.
$ sudo systemctl enable octez-dal-node
$ sudo systemctl start octez-dal-node
$ tail -f /var/log/tezos/octez-dal-node.log
Set up the baker
We need to edit one file as root to configure the baker. Edit /etc/default/octez-baker (for example with vi /etc/default/octez-baker) and edit the relevant lines in the file to reflect these settings:
AGNOSTIC_BAKER="true"
RUNTIME_OPTS="--dal-node http://127.0.0.1:10732"
You can uncomment the current values and edit them, or put the two lines at the bottom of the file. They will override anything above.
The first line tells the system to use the new combined baker. In previous releases, there was a baker for each protocol. Going forward, the combined baker is the preferred one. The second line tells the baker where to find the DAL node. By default, the baker will attempt to use all keys in the wallet. We are assuming that you just have the baker and companion key. You can adjust the BAKER_KEY variable if you want to configure this directly.
By default, the configuration tells the baker to vote pass for Liquidity Baking. This is fine for the purposes of getting going on a test network, but on mainnet you might want to do something else. We cover this later on.
Declare the key for baking and stake
Now we self-delegate to declare that we want to bake with the keys. As the tezos user, run the following commands:
$ sudo su - tezos
$ octez-client register key bakerkey as delegate
Next you need to declare the stake. We will use 6000tz.
$ octez-client stake 6000 for bakerkey
We also need to connect the companion key with the baking key.
$ octez-client set companion key for bakerkey to companion
$ exit
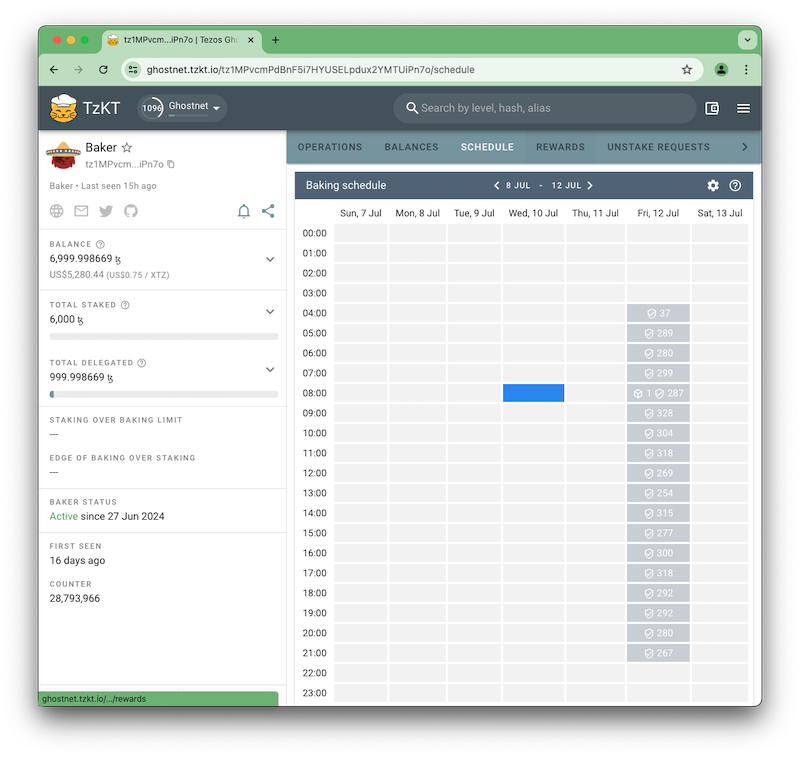
We can see the operations on the block explorer.

Both commands will output a lot of information about the operations, but we will skip the detail for now.
Now we configure the baker server to run. Exit the tezos account (e.g. with exit) and as root or using sudo:
$ sudo systemctl enable octez-baker
$ sudo systemctl start octez-baker
At the same time, the systemctl commands above also enable and run the accuser. This is the server that observes the network for bad behaviour such as double baking. We will talk about this later in the book.
You can check the log files in /var/log/tezos. There is a file baker.log for the baker and one called accuser.log for the accuser.
We are now ready to bake on tallinnnet. But we need to wait for 5 cycles before we will get baking rights.
We returned a few days later and found that we had baking rights.
On 12th July we started to attest and bake blocks. Here are three log entries from the server. The first is for a preattestation:
Jul 12 09:41:00.418: received new forge event:
Jul 12 09:41:00.418:   preattestation ready for delegate bakerkey (tz4E9Sgyx2mRg6GmVZRGNo8dD2imaXx9zfAf) at level 7049219 (round 0)
Jul 12 09:41:00.421: injected preattestation ooMpTSgQvFqUrVwT5tKbH6EQDwTJcWpwWZtHBS5mGGP1H8BbcXC
Jul 12 09:41:00.421:   for bakerkey (tz4E9Sgyx2mRg6GmVZRGNo8dD2imaXx9zfAf) for level 7049219,
Jul 12 09:41:00.421:   round 0
The second is for an attestation:
Jul 12 09:41:00.421: received new forge event:
Jul 12 09:41:00.421:   attestation ready for delegate bakerkey (tz4E9Sgyx2mRg6GmVZRGNo8dD2imaXx9zfAf) at level 7049219 (round 0)
Jul 12 09:41:00.423: received new head BLJVDFa4YgfvWtAz4miYWznpFzxDyqqWwDtMjWrLcSCkbfQ8iMU at
Jul 12 09:41:00.423:   level 7049219, round 0
Jul 12 09:41:00.968: injected attestation onwmEzchZqa4nu47oBCYAh9942FjQUuCwi63y99BY7WdbgC5Wdw for
Jul 12 09:41:00.968:   bakerkey (tz4E9Sgyx2mRg6GmVZRGNo8dD2imaXx9zfAf) for level 7049219, round
Jul 12 09:41:00.968:   0
Finally, a log entry for a baked block.
Jul 12 14:13:33.339: received new forge event:
Jul 12 14:13:33.339:   block ready for delegate: bakerkey (tz4E9Sgyx2mRg6GmVZRGNo8dD2imaXx9zfAf) at level 7052131 (round: 0)
Jul 12 14:13:34.004: block BKoNkYwfgjRbdQB1tLZYVQ1AQme9oAx2ksV2h9Sk6Ja9WuVWKr3 at level 7052131,
Jul 12 14:13:34.004:   round 0 injected for bakerkey (tz4E9Sgyx2mRg6GmVZRGNo8dD2imaXx9zfAf)
Jul 12 14:13:34.011: received new proposal BKoNkYwfgjRbdQB1tLZYVQ1AQme9oAx2ksV2h9Sk6Ja9WuVWKr3 at
Jul 12 14:13:34.011:   level 7052131, round 0
We have glossed over a lot of detail here, but there is nothing else you need to know to set up a baker on a test network. On a production setup you should do more to protect your keys.