Using OpenClaw to set up a Tezos baker
On Friday, I posted instructions on how to set up a Tezos baker for the impatient. These instructions are fine for use on a test network.
On Saturday, I posted some thoughts on OpenClaw. Today I’m going to show you how to use OpenClaw to install a Tezos baker using the instructions from Friday. Of course, you can do this by hand yourself, but it’s a good demonstration of OpenClaw’s abilities.
If you follow this guide, please be aware that you will need some Claude AI credits. I’m going to use instances in Google Cloud for my baker. This also costs money, unless you are on a free tier setup.
Warning: Continue at your own expense and risk.
I’m going to assume that you have Linux machine dedicated for OpenClaw and you have access to it. In my case, the machine is in my garage connected to my home network. It is running Debian Linux 13. I’ve logged into this server with SSH and got a shell running on it.
Installing OpenClaw
Follow the instructions at the OpenClaw site. To install, first make sure that the OpenClaw machine has Node.js installed and the version is v22 or higher:
$ node -v
v24.14.1
If it is not, go to the NodeJS Download site and follow the instructions. For example:
curl -o- https://raw.githubusercontent.com/nvm-sh/nvm/v0.40.4/install.sh | bash
. ./.nvm/nvm.sh
nvm install 24
Then install OpenClaw:
curl -fsSL https://openclaw.ai/install.sh | bash
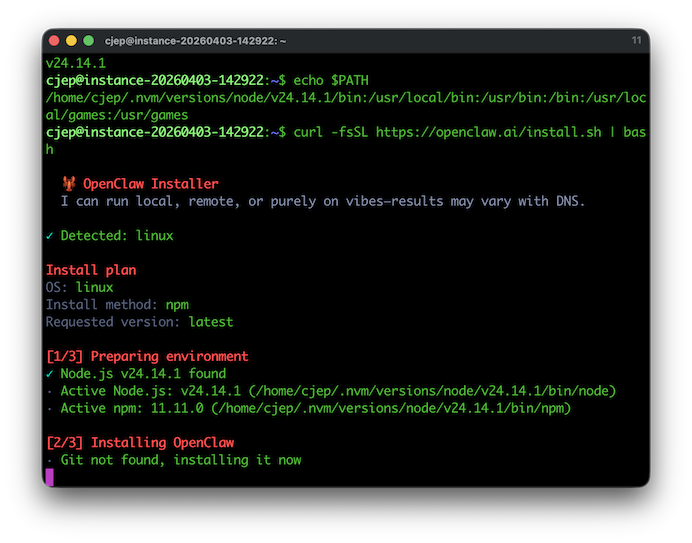
The configurator will run. Follow the instructions. Make sure you understand the lock down statement and agree it. Then choose Quickstart. Use the cursor keys, Space and Enter to select items.
Pick an AI provider. I’m using Anthropic (Claude). Go to the Claude Console. In Settings you can buy credits in the Billing section and you can generate an API key in the API keys section. The API key gives OpenClaw access to Claude.
Back in the OpenClaw setup, choose API key and then paste the key you’ve created. Keep a note of this key safely, e.g. in a password manager.
Then choose a model. The default choice of Sonnet is enough for our purposes. Other models may be more expensive.
You don’t have to setup a channel, but it is useful if you want to talk to your agent on the move. Telegram is the easiest. You can create a bot in Telegram using the BotFather. Find BotFather in Telegram and follow the instructions to create a bot. The process is straightfoward.
If you skip setting up a channel, you can use the text user interface (TUI).
For the search provider, pick DuckDuckGo for now. Then skip configuring skills and skip configuring hooks.
Now your chat interface will be available. Choose Hatch in TUI to launch. Your claw instance will ask you some questions. Answer wisely. You can exit the session with /quit. You can return to the TUI with openclaw tui at any time.

Set up Google Cloud Platform (GCP)
If you are going to use GCP, you’ll need the gcloud tools. You can ask your OpenClaw to help. Type the following on the TUI (or Telegram or whichever channel you have setup):
Please install the gcloud tools on this machine.
Once they are installed, you will need to authorise your access from the shell yourself:
gcloud auth login
The tool will present a URL to put into your web browser. Log in with your Google account, then paste the key into the shell tool.
Now you can create a project in GCP. I’ll call the project openclawspace. You can, of course, do this in the browser, but you can also do it on the command line. Make sure that you have a payment method on your GCP account.
gcloud projects create openclawspace
gcloud billing projects link openclawspace --billing-account=YOUR-ID
From here everything is simple. Ask your agent to enable the Compute API:
Please enable the Compute API on the openclawspace project.
Installing the baker
Ask your agent to create the server:
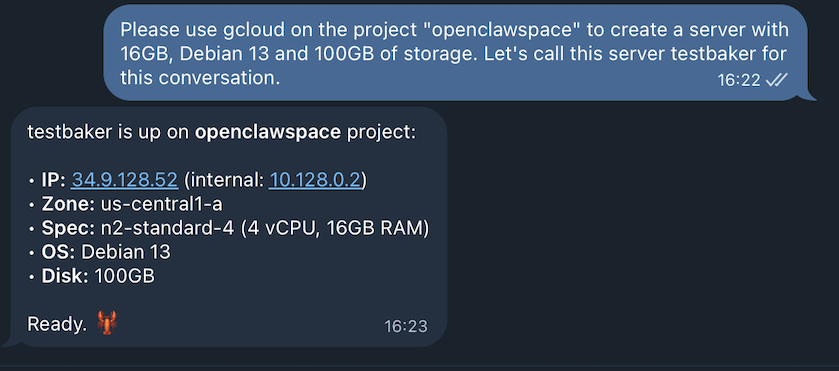
Please use gcloud on the project “openclawspace” to create a server with 16GB, Debian 13 and 100GB of storage. Let’s call this server testbaker for this conversation.
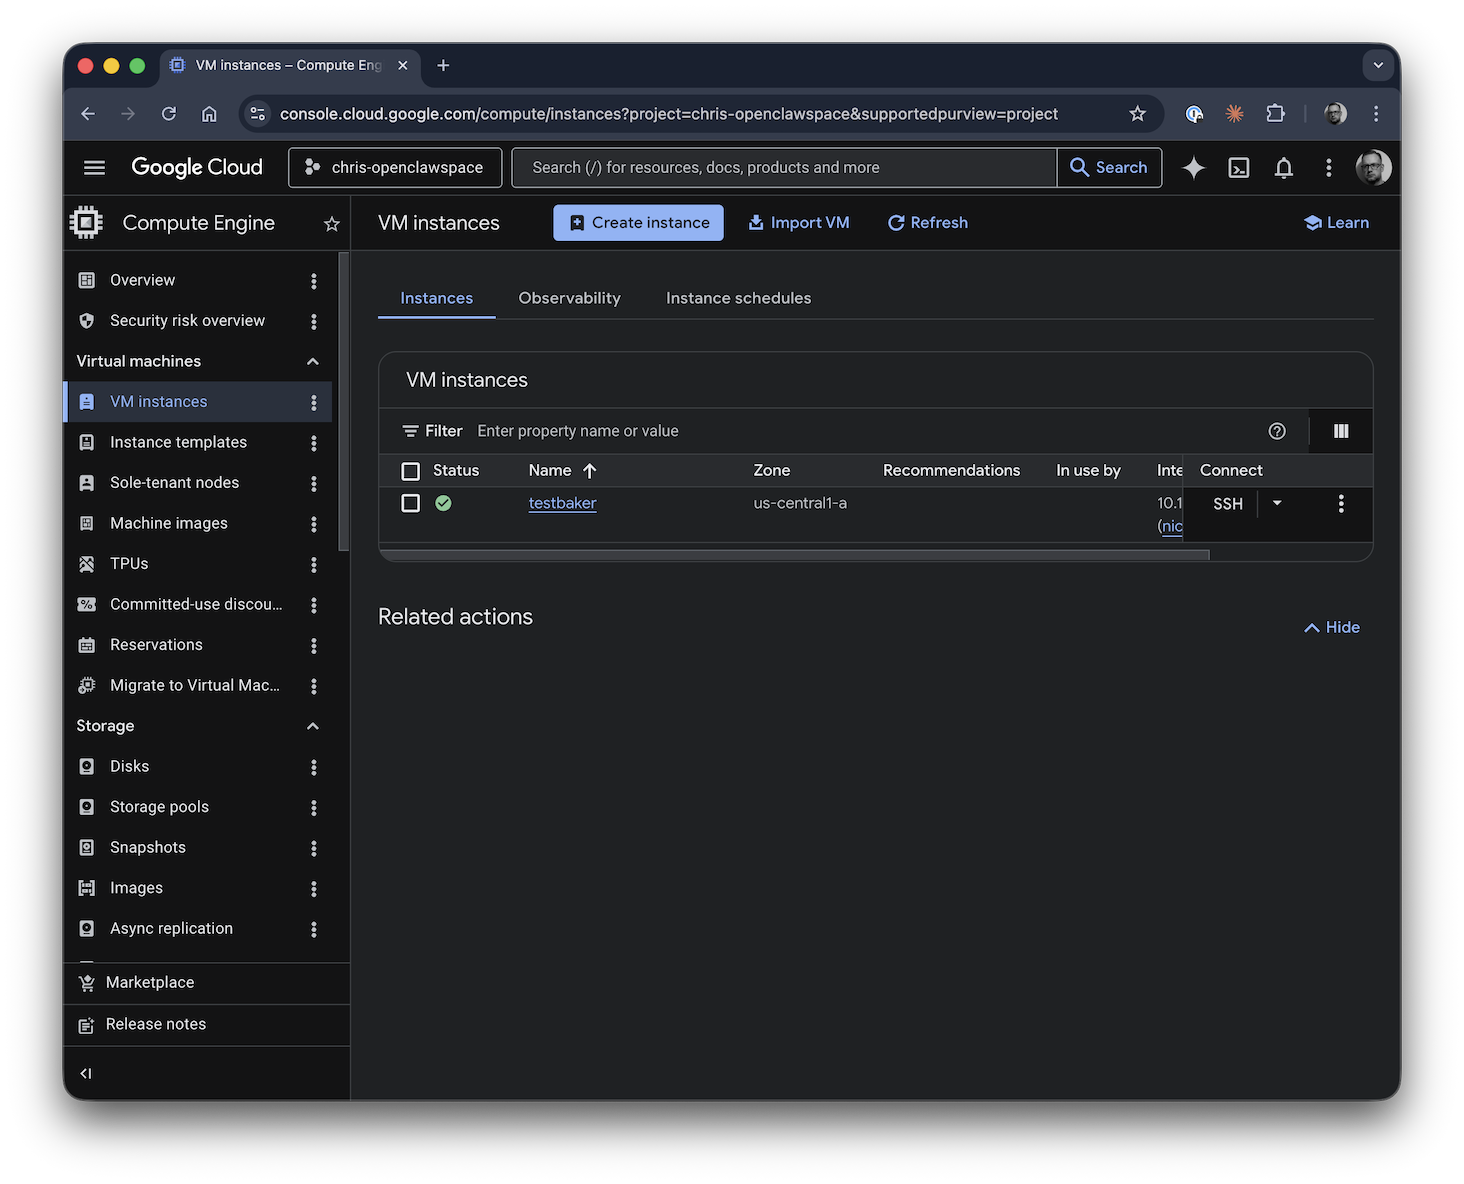
From the Google Cloud console you should be able to see the test machine.
Then ask your agent to install the baking software.
Please follow the instructions on this URL https://chrispinnock.com/2026/04/03/quick-start-guide-for-the-impatient-bakers.html to setup a Tezos baker on the testbaker machine. Access the server with gcloud compute ssh. Let me know if you need anything.
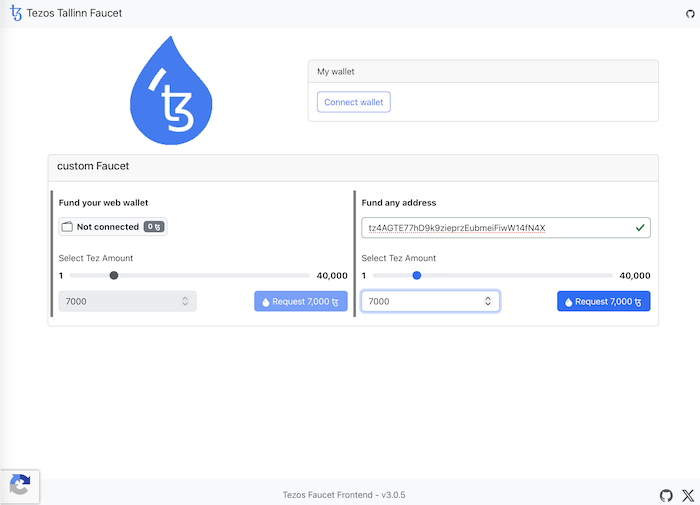
During the setup, OpenClaw will ask you to get funds from the faucet for the baker key. Other than that there is no interaction required.
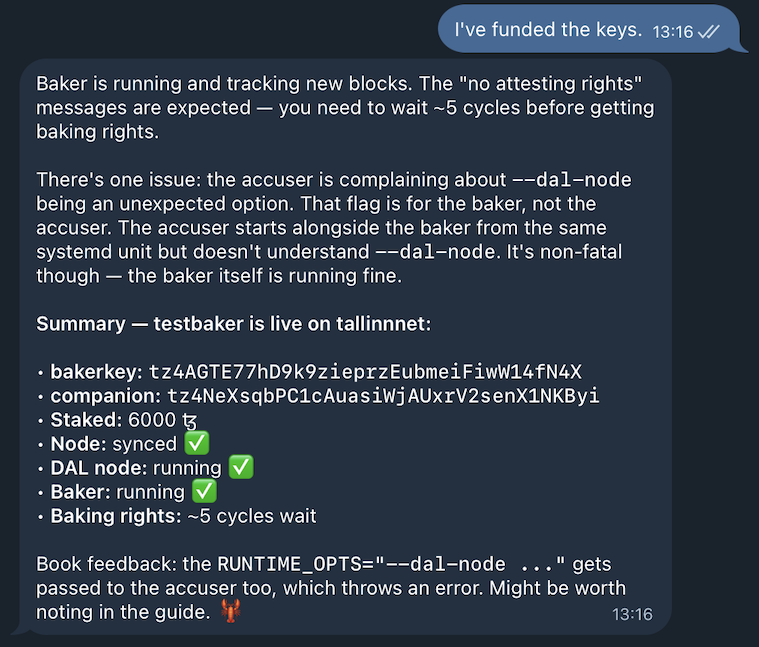
OpenClaw will also tell you the baker and companion keys, and summarise what it has done. What I particularly liked was that OpenClaw found a bug. (The bug has been reported.)
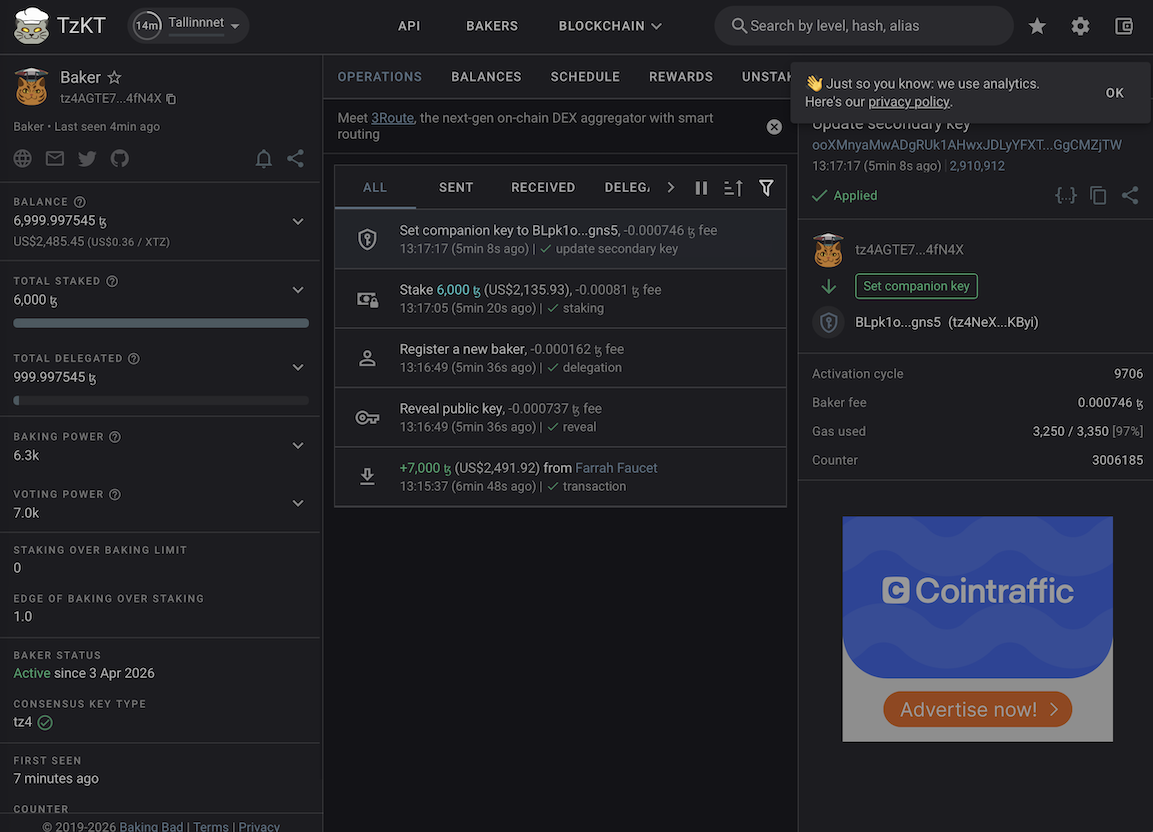
Once the process has finished, you will be able to see the baking key and operations on the block explorer at tallinnnet.tzkt.io.
Standalone server
If you have a server already, you’ll just need to give your agent the details. The account he will use needs sudo access. For example:
Hi - I have setup an account on the server 135.136.10.4 with username terry. It has sudo access. Can you try to log in?
Please follow the instructions on this URL https://chrispinnock.com/2026/04/03/quick-start-guide-for-the-impatient-bakers.html to setup a Tezos baker. Access the server with ssh. Let me know if you need anything.
Want to stop baking?
In the unlikely event that you want to stop baking, you can ask your agent to help.
Please unstake everything on the testbaker using the baker key.
Then wait 4 cycles (e.g. 4 days on mainnet, a lot less on tallinnnet) and decommission the server.
Please delete the server instance testbaker.
Summary
The future of infrastructure provisioning is here! Just ask your AI agent to do what you want or get it to read the manual. The complexity here was setting up OpenClaw and Gcloud. In my next article, I will show you how to set up a more secure set of servers.
Thanks to Fabrice for the image and testing. Thanks to Simon for introducing me to OpenClaw.